Final Research Assignment - Tutorial Video
Link : http://www.youtube.com/watch?v=Jy69QhME5nM
Final 500 words Text - Research Asignment
Sandbox 2 Editor is the program that allow user to edit their environment in the Crysis War Environment. The course BENV2423 requites student to be able to create, modify and give command to the character in the environment, to represent the interaction between people and environment. Throughout the whole course the two experiments allow students to explore and gain skill knowledge in using Sandbox 2 Editor program. In this final research assignment I will conduct a video tutorial that implement the skill that is most likely to be used in order to show the interaction between people and environment.
For the past few months that I have been researching on a number of tutorial on the public source and gathering some skill knowledge on this program I then decide to choose the most effective way of giving command to the environment which is AI flowgraph nodes as the main focus in this tutorial research assignment.
The video tutorial will be presented in written statement along will the video. As I have been following lots of tutorial I found that written one maybe more effecting as it is more accurate when indicating the different tools and flowgraph nodes in the tutorial.
For the video tutorial, it will contains three main subjects which are tutorial shows how to command character in environment to get on or out of the vehicle by Vehicle:Entre and Vehicle:Exite nodes and drive it around in the given direction by using AI:FollowPathSpeedStance node and AIPath, the tutorial shows the movement of characters in the given spot direction by using AI:GoToSpeedStance node and TagPoint and the last subject is tutorial shows how to command characters to follow the user(player) by using Enity: EnityPos and Game:LocalPlayer as the key important nodes. Tutorial on people behaviour will also included by using AI:Execute, to show some action of people when they are in environment over a period of time. Some basic skill tricks will be also demonstrated though out the tutorial.
The action and movement as I stated on the above paragraph are those that show the significant relationship of people and environment. As we, students, used the train structure to involve in our understanding of the Pority therefore I the actions that involve in the train station would be the important part for user to navigate the interaction between people and environment. As people walk through space we can then identity the time and the area they are more likely to be in. Vehicle is another object that most involved in the interaction of people and environment. Therefore by combining the skill of knowledge focusing on that idea and demonstrating them into the easy step-by-step tutorial, the great understanding of Porosity the can be arrived.
By doing a lot of researches on the Sandbox 2 tutorial for the past few months I gain lots of skill and technique to command people to move through space at the right area and direction hence the understanding of people in the environment is created.
Reference:
- "Crysis Sandbox Tutorial 12 Make AI Drive Vehicle" http://www.youtube.com/watch?v=elOSbV3s0dc&NR=1
- "Crysis Sandbox 2: Tutorial 22 - AI patrols" http://www.youtube.com/watch?v=yf79A-HfRAc
- "FGNode:AI:AIExecute" - http://wiki.crymod.com/index.php/FGNode:AI:AIExecute
- "FGNode:AI:AIFollowPathSpeedStance" - http://wiki.crymod.com/index.php/FGNode:AI:AIFollowPathSpeedStance
- "FGNode:AI:AIGotoSpeedStance" - http://wiki.crymod.com/index.php/FGNode:AI:AIGotoSpeedStance
- "FGNode:Vehicle:Enter" - http://wiki.crymod.com/index.php/FGNode:Vehicle:Enter
- "FGNode:Vehicle:Exit" - http://wiki.crymod.com/index.php/FGNode:Vehicle:Exit
Friday, November 5, 2010
EXP2_Week7: Final EXP2 Files
Link to Crysis Level folder: http://www.filefront.com/17479108/3326192_level_exp02.zip
Link to Crysis Object folder: http://www.filefront.com/17478772/3326192_object_exp02.zip
For Crysis : Press "U" to makr AI sits and Press "O" to make AIs follow you
Link to SketchUp model : http://sketchup.google.com/3dwarehouse/details?mid=b9371ffa2fddb73669accf55b05e0e60&ct=mdsa&prevstart=0
Link to Final Porosity Lens video: http://www.youtube.com/watch?v=reV0Bg1ElZ8
EXP2_Week6 :Text on tutorial (continue)
Research (tutorial) Assignment - First draft paragraphs (continue)
The main subject of the tutorial will be focusing on AI nodes which involve in most of the action of the AI (character). There are a number of tutorial on the public source such as internet that show you how to create the action. After some research and having experiences of being a person who watch those tutorial before so I decided to create the tutorial that combine the movement of AI, Entity and AI behavior by using flowgraph nodes. I will demonstate the tutorial that take the audience each steps to complete the process of how to create an action.
In addition, throught out the tutorial I will be demonstarting some of the trick of how to use basic tool. Me, as a student who was first introduced to this program at the beginning of the course found quite a number of problem in using some basic tools. I will set a topic in the tutorial on this subject however thoughtout the tutorial that will be shown, a number of technique on basic tools will be shown as well. The tutorial will be presented in written text along the video.
EXP2_Week6: Developed structure (textures)
Developed structure
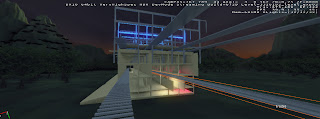
This is the video showing the final structure of the sketch installation with light and texture. The video showing the interior and exterior structure.
The sketch installation is kept into the simple train station however the structure that being place allow light to give a great effect.
Link: http://www.youtube.com/watch?v=V6s9s_k5Jjg
EXP2_Week4: Paragraphs on tutorial
Research (Tutorial) Assignment - First draft paragraph
Thoughtout the course BENV2423 the students had established the knowleage of how to use an environment interactive program, Sandbox 2 Editor. Starting from how to create basic map or which we can call it "land" to the technique and some tricks to give command of action to character in the environment, or basicly a "game".The course focus on the interaction of people to the enviroment therefore in this final research assignment I will be conducting a video tutorial on the basic action of the people such as moving into given direction, getting into the vehicle, setting some behaviour and moving a vehicle. These actions aare the basic action that most of people involve with everyday and all of the skill involve in this has been great implement through out the course.
The tutorial will focus into command the action by using flowgraph. There will be quite a number of flow of flowgraph nodes go into this tutorial. Such as, AI:GoToSpeedStance, Vehicle:Entre, AI:Excecute, Enity:EntityPro as an example.
EXP2_Week4: Developed 3 video clips of flowgraph nodes + Developed model with lights
Developed Video clips (Chisen flowgraph nodes)
As further research is taken placed and mode thought about EXP2 came through, I then re-considered of what flowgraph nodes I will be using in Porosity Lens. As the concept of exp2 is to present how people interact with environment and observe the time when people travel throught space. The 3 flowgrph nodes I chose are as follow;
1. Vehicle:Entre
Link: http://www.youtube.com/watch?v=w3ysPABIRa8
This flowgraph node give command to AI to get into the Vehicle (Truck in this video). With implementation with AIpath and AI:FollowPathSpeedStance, the vehicle then moving in the given path direction. When that action is secceeded the node Vehicle:Exit is used to command AI or player to get out of vehicle. In this video it shows how example of these nodes I applied. Travelling time on the vehicle is one of the most important part of how people travel thourh and interact with spaces or environment. So I decided to put this part of action into my Porosity Lens.
2. AI:GoToSpeedStance
Link: http://www.youtube.com/watch?v=DBDWaDI30q8
In this video it shows how AI:GoToSpeedStance command the action of AI . AI is commanded to move in the spot direction that were given by AITagPoint. The implementation of Entity:EntityPos is also applied. As I need to find the position of the entity for the AI to move to. The video shows how the AI move from one spot to another with the amount of time is take. This action can be implemented to the Porosity Lens as I will be putting this action into train station showing people walking around though the environment.
3. Game:LocalPlayer
Link: http://www.youtube.com/watch?v=ZdH2Af-0QPw
For this video, the Game:LocalPlayer node is added.It is used to command the AI to follow the player (me). This action is formed by AI:GoToStanceSpeed as the node give to command to AI to move and Game:LocalPlayer is the command to VI to move to the local player(me). The video showing AIs following playyer(me). This will be useful to show how people walk in the space or area that I walk through.(Assuming this area to be the most recent area people walk through). This present the time consumption and the interaction between people and place.
Developed model
Here I have changed some part of the model to fit into the train station and also placed some light in the model...


EXP2_Week3: Sketch Installation
Images from Google SketchUp
The Sketch Installation is modeled upon the BENV2423 STRUCTURE model. It was design to fit the structure, representing a platform of train station. The seats and stairs are made for passenger who will be passing through.


Images for Crysis Environment


Video
Thursday, November 4, 2010
EXP2_Week2: Research (continue)
I've found more tutorial on youtube which may be helpful in my porosity lens. The tutorial shows how to use flowgraph to implement the different movement and action in crysis environment.
- Transporting AI by vehicle
http://www.youtube.com/watch?v=gF_Sd4jtPmU
- Make a moving train
http://www.youtube.com/watch?v=vB3y98yKIXY
-AI walk in the building
http://www.youtube.com/watch?v=9g37kcx7J24
-some AI behaviour
http://www.youtube.com/watch?v=vQIGxrq22n8&feature=related
- Transporting AI by vehicle
http://www.youtube.com/watch?v=gF_Sd4jtPmU
- Make a moving train
http://www.youtube.com/watch?v=vB3y98yKIXY
-AI walk in the building
http://www.youtube.com/watch?v=9g37kcx7J24
-some AI behaviour
http://www.youtube.com/watch?v=vQIGxrq22n8&feature=related
EXP2_Week2: Porosity Lens Brief
"Porosity Lens" Brief - 250 words
As the terms “Porosity Lens” in this case means the way to understand peoples navigate through environment, by flowgraph nodes. Base on the research on my chosen flowgraph node, my Porosity Lens will present the different in time that people spent in different place and situation.
The movement and speed will be the significant part of this idea. Flowgraph node that allows me to control the direction, movement and speed will give the great result to show the “time” that people spend in environment. Not just in the building or train station but also in vehicle which is considered to be part of an environment. Therefore in the Porosity Lens, it will be about the movement and speed shown by people in station and car or even a train which is result in an amount of time.
We will be able to observe how people are transported through space and how much time they spend on each different space. The flowgraph nodes that I have chosen will allow me to do so. Focusing on the particular one such as Vehicle:Entre, I believe this will show me how do people get into the vehicle and much do time do they spend. Following by the Movement:MoveEntityTo node that will command people to walk from one sport to other spot which allows me again to observe their behaviour and so their interaction to environment. And flowgraph node, Input:Key may be applied in Porosity Lens to allow me to control some factors that may effects people behaviour on their interaction with environment.
EXP2_Week2: Third 30 seccond video clip
The last 30 sec video clip shows the example of the use of flowgraph Input:Key node to command the entity to move when the playerpress the key. In this video the light is an entity. When he player press key "h" (for example) the light move and when press other the other light move.
Link : http://www.youtube.com/watch?v=B7slo1w6ZIQ
EXP2_Week2: Second 30 section video clip
The 30 second video clip shows the example of entities moving in the given direction and give speed. It represents the movement of rotation and linere line regarding the chosen flowgraph note of mind Movement:MoveEntityTo and Movement:RotateEntityTo.
Link:http://www.youtube.com/watch?v=DHGQUaABdoU
EXP2_Week2: S.W.A.T Analysis
S.W.A.T Analysis of three chossen flowgraphs nodes.
Flowgraph node 1 :
Vehicle: Enter
S = easy command to be used in order to make AI or player enter the vehicle
W = can only assign on the vehicle, not other entities or objects
O = more than one AI can enter the vehicle, depending on the type of vehice
T = there is no threats
Flowgraph node 2 :
Movement:MoveEntityTo
S = give exact destination (direction) and speed to the entities
W = speed and direction that were given remain constant
O = entities can move to destination over a period of time that are given, players do not need to control
T = players lose control
Flowgraph node 3 :
Entity:EntityPos
S = give the exact position of entity
W = position can be hard to navigate for player (working in numbers)
O = can be implement with other nodes to create a movement for entities
T = there is no threats
Input:Key
S = give the full control to the player, as it is a trigger to start the action when the key(given key) is pressed
W = limited key (hence limited action), same key cant be used for different actions
O = players have more command in the interactive environment
T = lots of keys applied can be confusing for players
(ps. these flowgraphs are only the first draft, may or may not be aplied in the exp2)
EXP2_Week1: First 30 second video clip
In this video clip, the AIs enter the vehicle and the vehicle move in given direction (AI path). This video shows the example of the action of AI:AIFollowSpeedStance, Vehicle:Entre nodes.
Link: http://www.youtube.com/watch?v=7F-3pceN9qs
EXP2_Week1 : Three chosen Flowgraph nodes
After I did some research on the flowgraph node I then came out with some of the idea to apply to exp2. Some flowgraph nodes are really useful and so I chose to use them in this experiment.
1.Nodes to command ALor player to get into venhicle(car) and then vehicle move
Vehicle:Enter
Makes AI or player enter specified seat of specified vehicle. This node will allow AL to enter to the venhicle. The reason I chose to use is because it is an way to command the AL to get into the vehicle as I will use this action with out any input control therefore the AL move in venticle as the game start.
Vehicle:VehicleMovement
Handle vehicle movement. I chose to use this node because the node control the vehicle to move therefore I will be capture the movement of vehicle outside of the vehicle which allows me to see all of the action that is taking place.
2.Nodes to give the direction (destination) and speed to the movement of object or entity.
Movement:MoveEntityTo
The node move an entity to a destination position at a defined speed. This node control the movement of any entity. Entity will move in the direction and spped that were given. This node is very useful in controlling the entity to move in the game. Such as elavator, doors adn etc.
Movement:RotateEntityTo
The node rotate an entity during a defined period of time. Similar to the node above (MoveEntityTo) but control the movement in the rotational movement. This node also given the time of rotation to the entity. Since in exp2 the movement will be most involved therefore by using this node along with others will help me achive the goal.
3.The nodes to create a trigger to activate the action
Entity:EntityPos
Entity Position/Rotation/Scale. This node indicate the detail on the position of entity. I chose this node because it can be used as a destination for the movement of other object which is very useful in commanding one object of AL to move to one spot or other.
Input:Key
This node assign the particular key to activate the action when the key is pressed. By applying this node then I can concrol any ction in the environment such as press to open the door or press to take off. This node will be really useful and it is common when interacting player and game.
Reference : http://wiki.crymod.com/index.php/Flowgraph_Nodes#Entity
EXP2_Week1 : Research on Flowgraph nodes
Tutorials
These are some useful video tutorial on youtube which show how to create many different action in the environment.
- How to make AL Enter Vehicle
http://www.youtube.com/watch?v=rv1nptvZ3HI&feature=related
- How to transport AL units from 1 point to another
http://www.youtube.com/watch?v=gF_Sd4jtPmU
- How to make a lightswitch
http://www.youtube.com/watch?v=vO5gOBoue7Y
- How to make AL Squadmates Follow you
http://www.youtube.com/watch?v=b0lalCdCtZ0&feature=related
- How to create a laser
http://www.youtube.com/watch?v=3K7ri8pwISI&feature=related
- How to add AL to venicle
http://www.youtube.com/watch?v=QjARJ9RR-rM&feature=related
-How to make a helicopter fly
http://www.youtube.com/watch?v=uo52oVx48fc
Research on node which may be applied in my flowgraph
Input: Key
The node which is used to assign a particular key to enable an action that will be activate when the key is press. It is act like a trigger to start the action in particular object. This node effectively allows me to choose to activate object movement by controlling the key on keyboard.
Movement:MoveTo
Move between two positions at a defined speed . Note to give the object direction and speed to move between two particular point. This is the basic node which is used to move object from one position to another. This node allows me to give direction and speed to particular object I assign the node to.
Environment:ComputeLighting
The node to compute the amount of light at a given point. This node may be useful if the action involve in the amount of light changing due to different position.
AI:AIEnable
Node to play an animation. It is used to enable the action that have been assigned into object. Allows me to create and moving object in the game without having to press the key. Hence Animation (acion in game object) plays automaticly.
AI:AISpeed
A node of movement speed controller. Use to control speed. Useful when need the constant speed in the object.
HUD:HUDControl
HUDControl node is used to control the players HUD. The node has functionality to enable/disable the HUD, add interference effects and break and reboot the HUD interface.
Entity:EntityInfo
This node outputs the id, name, class and archetype of the target node when triggered. In cases where entity types need to be compared this node is very useful.
Reference : http://wiki.crymod.com/index.php/Flowgraph_Nodes#Entity


Monday, August 30, 2010
Final Submission: Link to files and model
Final Submission for Experiment 1
1.Link Documentary video clip from Youtube: http://www.youtube.com/watch?v=nEFSkGOc1Ds
2.Link to Crysis war Environment (FIlefont)
Levels: http://www.filefront.com/17247659/3326192_levels.zip
Objects: http://www.filefront.com/17247636/3326192_objects.zip
Key in Crysis:
P for elevators to go up
L for elevators to go down
U to open the door
O to close the door
3.Link to SketchUp model: http://sketchup.google.com/3dwarehouse/details?mid=9bda24aebd69f356545828d48788cefa&ct=mdsa
Final Video for Documentary_"The Physical Effects of Explosions on Porosity"
This is the final version of my documentary...
The documentary focusing on the effect of the explosion , the transformation of force and how it transfered.....
Link: http://www.youtube.com/watch?v=nEFSkGOc1Ds
The documentary focusing on the effect of the explosion , the transformation of force and how it transfered.....
Link: http://www.youtube.com/watch?v=nEFSkGOc1Ds
Week5: Video showing final Crysis Environment...
Video showing final Crysis Environment...
This is the video showing the environment before putting any explosion..The video show the relationship between the ramps and how the train rail strucutre fit into the environment...
Link : http://www.youtube.com/watch?v=0zWEFubqBcU
This is the video showing the environment before putting any explosion..The video show the relationship between the ramps and how the train rail strucutre fit into the environment...
Link : http://www.youtube.com/watch?v=0zWEFubqBcU
Platforms and ramps in environment and View from platfrom...
The images of the platforms and ramps in Crysis War Environment...


These are the images showing the views from each of the platforms in the environment...
The first view : from the main platfroms

View from second platform, up in the elevator

This is the view from the platfrom at ground level...

The train structure in environment....


Week4: Documentary mode (150words)
Observational Mode
The documentary mode I will be using for my documentary is “Observational Mode”. I choose to use this mode because I want to focus on the reaction that happen when the explosion occur also to show to relationship between the two different types of object. Observational mode of documentary allows the audience to see the point that I try to point out, the understating of explosion. By presenting the documentary this way, it will give the audience to observe all the action that happen and understand it through the text which will go along with the video that show all the action and relation of the object as well as the explosion which is the key concept that the documentary try to present. By showing what happening in the environment while the explosion occur and explain it this way I believe this will maximise the whole purpose of the documentary.
The documentary mode I will be using for my documentary is “Observational Mode”. I choose to use this mode because I want to focus on the reaction that happen when the explosion occur also to show to relationship between the two different types of object. Observational mode of documentary allows the audience to see the point that I try to point out, the understating of explosion. By presenting the documentary this way, it will give the audience to observe all the action that happen and understand it through the text which will go along with the video that show all the action and relation of the object as well as the explosion which is the key concept that the documentary try to present. By showing what happening in the environment while the explosion occur and explain it this way I believe this will maximise the whole purpose of the documentary.
Platforms and ramps in environment
These are models of platforms and ramps I will be putting them into the environment....
I decided to have 3 different platforms and ramps in order to place them in different area and capture the explosion from different view...
First platfrom and ramp...


This is the one I created previously....This one is used to capture the video of explosion from lower view...at landscape view...
I decided to have 3 different platforms and ramps in order to place them in different area and capture the explosion from different view...
First platfrom and ramp...

This is the main platform....contains two sided ramp with the open that will be opened and closed... The platform sitting right infront of the explosion area...this will be the main area to capture explosion...
Second platfrom and ramp... + elevator...

This is another platfrom that will be placed in the angle to the explosion area...The platform contains samll ramp and elevator...This is created t capture explosion from higher point of view...I might place more than one of this platform in my environment....
The last platfrom

This is the one I created previously....This one is used to capture the video of explosion from lower view...at landscape view...
Week3: videos showing result of experiment from tutorial
These are videos capturing the result of my experiments on the tutorials in week 3 studio.....
Experimenting with the rope....
Experiment to move entity using trackview....
And constraints the objects....
Reference
*All the videos are created and captured by me
**The videos are uploaded on www.youtube.com
Experimenting with the rope....
Experiment to move entity using trackview....
And constraints the objects....
Reference
*All the videos are created and captured by me
**The videos are uploaded on www.youtube.com
Week2: Platform and ramp
This is only the draft of the platform and ramp. I was just playing around with sketchup and some texture....


The following is the train station structure in the environment....


Sunday, August 29, 2010
Week2: Hypothesis for the effect of explosion (50 words)
Hypothesis for the effect of explosion
(The hypothesis applied to the three explsion uploaded in the previous blog update)
"The explosion causes the object to explode into fractions travel in random direction according to the force applies to that individual object. The size of each fraction also depend on the force reflect on it. The force need to be greater than the gravity in order to explode all the objects into fractions."
Tuesday, August 10, 2010
Week 2 : Explosion Experiment
Here are my videos of explosion experiments in Crysis War
Reference :
*All the videos are created and captured by me.
**All the videos are uploaed on http://www.youtube.com/
Reference :
*All the videos are created and captured by me.
**All the videos are uploaed on http://www.youtube.com/
Week 1 : Video of environment in progress
Video of environment in progress....
This is 30 second video captured Crysis War environment in progress.
And another one....
Reference :
*All the videos are created and captured by me.
**The videos are uploaed on http://www.youtube.com/
This is 30 second video captured Crysis War environment in progress.
And another one....
Reference :
*All the videos are created and captured by me.
**The videos are uploaed on http://www.youtube.com/
Tuesday, July 27, 2010
Week 1 : Capturing landscape
Here are the images of the landscape I created in the first week lab...


Subscribe to:
Posts (Atom)